So you have seen the above image by now, right?
Let me explain the above image in short.
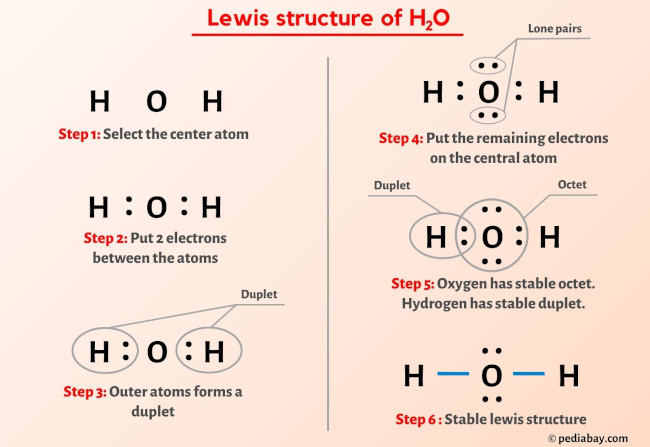
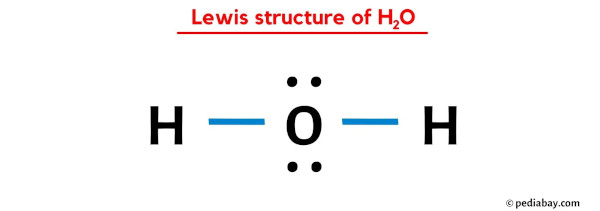
H2O lewis structure has an Oxygen atom (O) at the center which is surrounded by two Hydrogen atoms (H). There are 2 single bonds between the Oxygen atom (O) and each Hydrogen atom (H). There are 2 lone pairs on the Oxygen atom (O).
If you haven’t understood anything from the above image of H2O lewis structure, then just stick with me and you will get the detailed step by step explanation on drawing a lewis structure of H2O.
So let’s move to the steps of drawing the lewis structure of H2O.
Steps of drawing H2O lewis structure
Step 1: Find the total valence electrons in H2O molecule
In order to find the total valence electrons in H2O molecule, first of all you should know the valence electrons present in hydrogen atom as well as oxygen atom.
(Valence electrons are the electrons that are present in the outermost orbit of any atom.)
Here, I’ll tell you how you can easily find the valence electrons of hydrogen as well as oxygen using a periodic table.
Total valence electrons in H2O molecule
→ Valence electrons given by hydrogen atom:
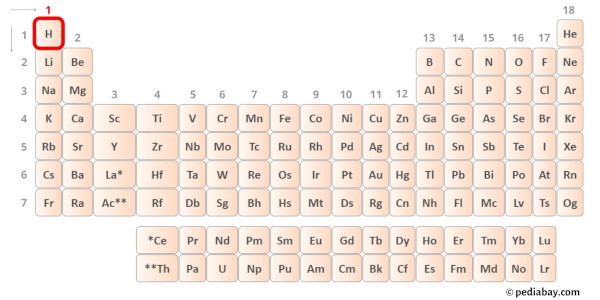
Hydrogen is group 1 element on the periodic table. [1] Hence the valence electron present in hydrogen is 1.

You can see that only 1 valence electron is present in the hydrogen atom as shown in the above image.
→ Valence electrons given by oxygen atom:
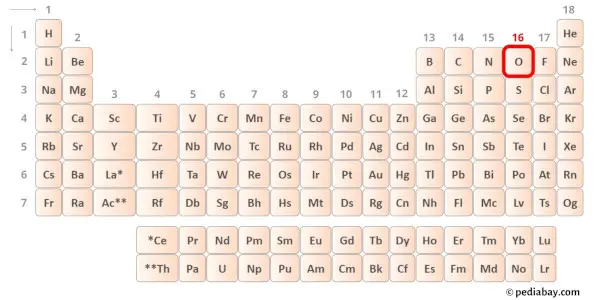
Oxygen is group 16 element on the periodic table. [2] Hence the valence electrons present in oxygen is 6.
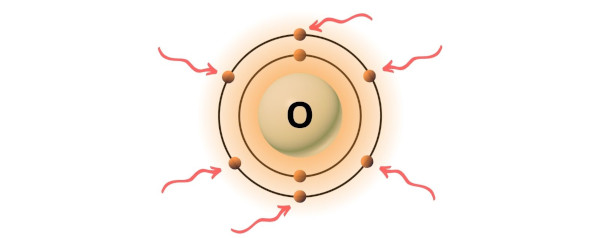
You can see the 6 valence electrons present in the oxygen atom as shown in the above image.
Hence,
Total valence electrons in H2O molecule = valence electrons given by 2 hydrogen atoms + valence electrons given by 1 oxygen atom = 1(2) + 6 = 8.
Step 2: Select the central atom
For selecting the center atom, you have to remember that the atom which is less electronegative remains at the center.
(Remember: If hydrogen is present in the given molecule, then always put hydrogen outside.)
Now here the given molecule is H2O (water) and it contains hydrogen atoms (H) and oxygen atom (O).
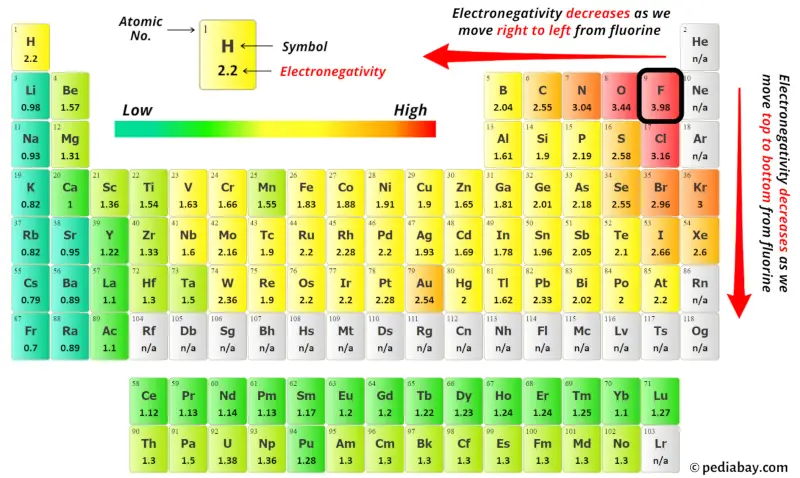
You can see the electronegativity values of hydrogen atom (H) and oxygen atom (O) in the above periodic table.
If we compare the electronegativity values of hydrogen (H) and oxygen (O) then the hydrogen atom is less electronegative. But as per the rule we have to keep hydrogen outside.
So here the oxygen atom (O) is the center atom and the hydrogen atoms (H) are the outside atoms.

Step 3: Connect each atoms by putting an electron pair between them
Now in the H2O molecule, you have to put the electron pairs between the oxygen atom (O) and hydrogen atoms (H).

This indicates that the oxygen (O) and hydrogen (H) are chemically bonded with each other in a H2O molecule.
Step 4: Make the outer atoms stable. Place the remaining valence electrons pair on the central atom.
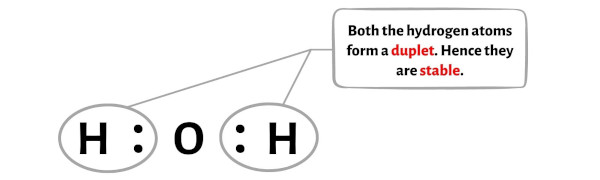
Now in this step, you have to check the stability of the outer atoms.
Here in the sketch of H2O molecule, you can see that the outer atoms are hydrogen atoms.
These outer hydrogen atoms are forming a duplet and hence they are stable.
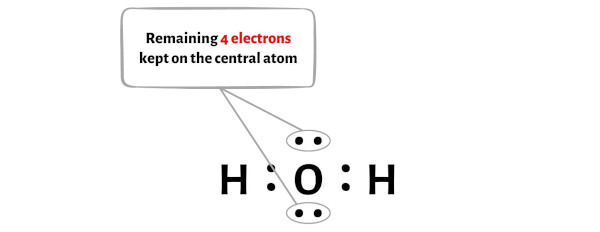
Also, in step 1 we have calculated the total number of valence electrons present in the H2O molecule.
The H2O molecule has a total 8 valence electrons and out of these, only 4 valence electrons are used in the above sketch.
So the number of electrons which are left = 8 – 4 = 4.
You have to put these 4 electrons on the central oxygen atom in the above sketch of H2O molecule.
Now let’s proceed to the next step.
Step 5: Check the octet on the central atom
In this step, you have to check whether the central oxygen atom (O) is stable or not.
In order to check the stability of the central oxygen (O) atom, we have to check whether it is forming an octet or not.
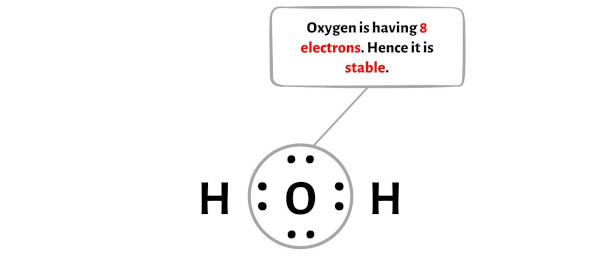
You can see from the above picture that the oxygen atom is forming an octet. That means it has 8 electrons.
And hence the central oxygen atom is stable.
Now let’s proceed to the final step to check whether the lewis structure of H2O is stable or not.
Step 6: Check the stability of lewis structure
Now you have come to the final step in which you have to check the stability of lewis structure of H2O.
The stability of lewis structure can be checked by using a concept of formal charge.
In short, now you have to find the formal charge on hydrogen (H) atoms as well as oxygen (O) atom present in the H2O molecule.
For calculating the formal charge, you have to use the following formula;
Formal charge = Valence electrons – (Bonding electrons)/2 – Nonbonding electrons
You can see the number of bonding electrons and nonbonding electrons for each atom of H2O molecule in the image given below.
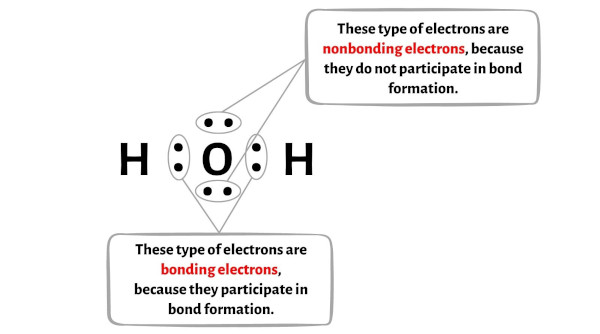
For Hydrogen (H) atom:
Valence electron = 1 (because hydrogen is in group 1)
Bonding electrons = 2
Nonbonding electrons = 0
For Oxygen (O) atom:
Valence electrons = 6 (because oxygen is in group 16)
Bonding electrons = 4
Nonbonding electrons = 4
| Formal charge | = | Valence electrons | – | (Bonding electrons)/2 | – | Nonbonding electrons | ||
| H | = | 1 | – | 2/2 | – | 0 | = | 0 |
| O | = | 6 | – | 4/2 | – | 4 | = | 0 |
From the above calculations of formal charge, you can see that the hydrogen (H) atoms as well as oxygen (O) atom have a “zero” formal charge.
This indicates that the above lewis structure of H2O is stable and there is no further change in the above structure of H2O.
In the above lewis dot structure of H2O, you can also represent each bonding electron pair (:) as a single bond (|). By doing so, you will get the following lewis structure of H2O.
I hope you have completely understood all the above steps.
For more practice and better understanding, you can try other lewis structures listed below.
Try (or at least See) these lewis structures for better understanding:
| N2 lewis structure | O2 lewis structure |
| CO lewis structure | CH4 lewis structure |
| BF3 lewis structure | NO3- lewis structure |
Jay is an educator and has helped more than 100,000 students in their studies by providing simple and easy explanations on different science-related topics. He is a founder of Pediabay and is passionate about helping students through his easily digestible explanations.
Read more about our Editorial process.